Checking electronic signatures using Microsoft Outlook 2013
-
1.
When an email with an electronic signature is received successfully, a "Ribbon" icon is displayed on the right side of the email box and on the right side of the field where the receiver, signer and other information are displayed in the page showing a detailed description of the email.
Check point(1) Make sure that a security warning does not appear and click on the "Ribbon" icon.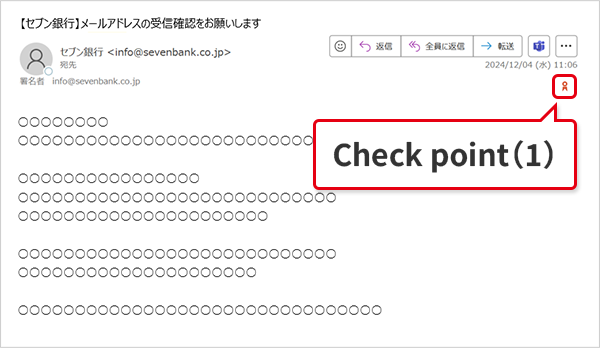
-
2.
When the window for the "Digital signature:Valid" opens, click on the "Advanced" button to display the "Message security properties."
Check point(2)Make sure that the email address of the signer in the "Description" field is: *****@sevenbank.co.jp or *****@mc.sevenbank.co.jp
Then, click on the "Trusted certificate authority" button.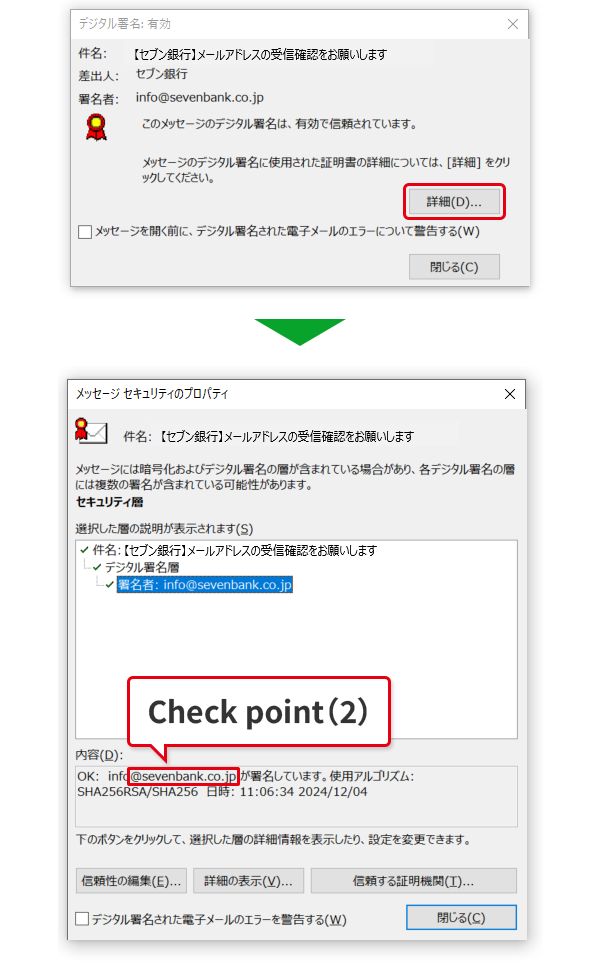
-
3.
Click on the "Show certificate authority" button to open the "Certificate display", and then check the information.
Check point(3)
The owner of the digital certificate should be: Seven Bank, Ltd.
Check point(4)
The certificate authority of the digital certificate should be:Symatec Class 3 Organizational CA-G2.
When the email address is ******@mc.sevenbank.co.jp, the certificate authority of the digital certificate should be:GlobalSign GCC R6 SMIME CA 2023.
Check point(5)
The email receipt date should fall before the expiration date of the digital certificate.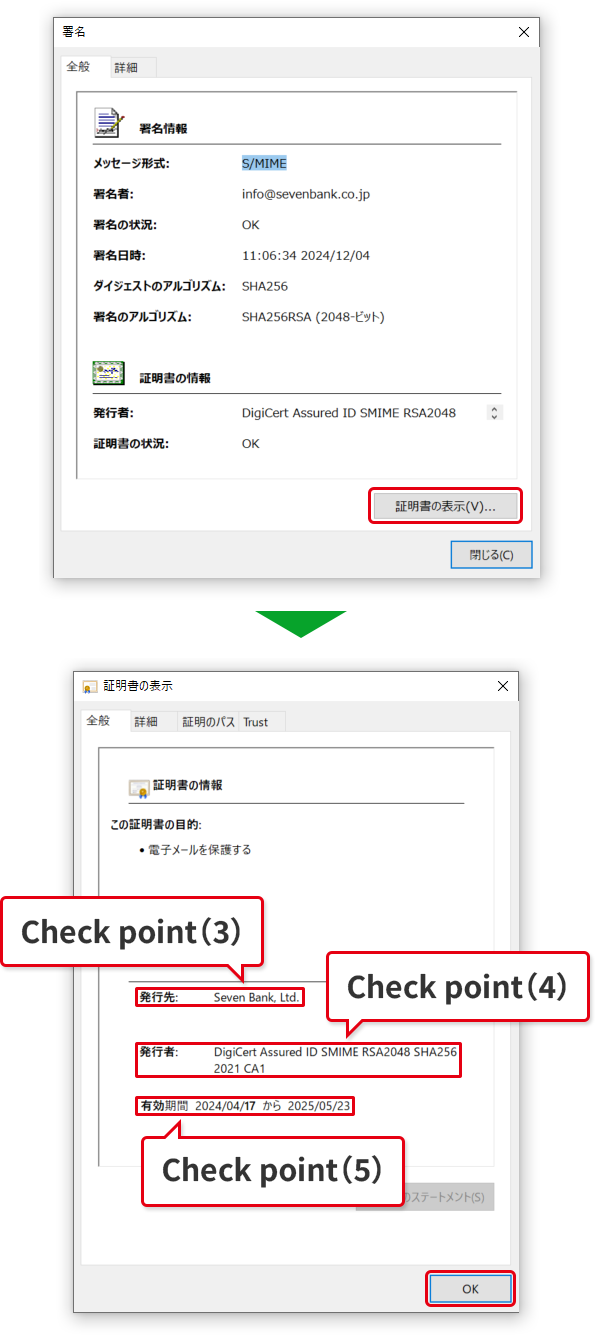
When an email software is used that does not support the digital signature
When using certain email software that does not support this signature, the email message will display but the file "smime.p7s" is attached to the email as the digital certificate.
The electronic signature cannot be confirmed even if the attached file is opened.
In addition, the procedure for checking the digital signature varies depending on the email software. When using another email software that is not Microsoft Outlook 2013, contact the software provider about the specific procedure for checking the digital signature.